How to Compress Images Without Losing Quality — The Complete Free Guide (Up to 90% Smaller)
Advertisement
How to Compress Images Without Losing Quality — The Complete Free Guide (Up to 90% Smaller)
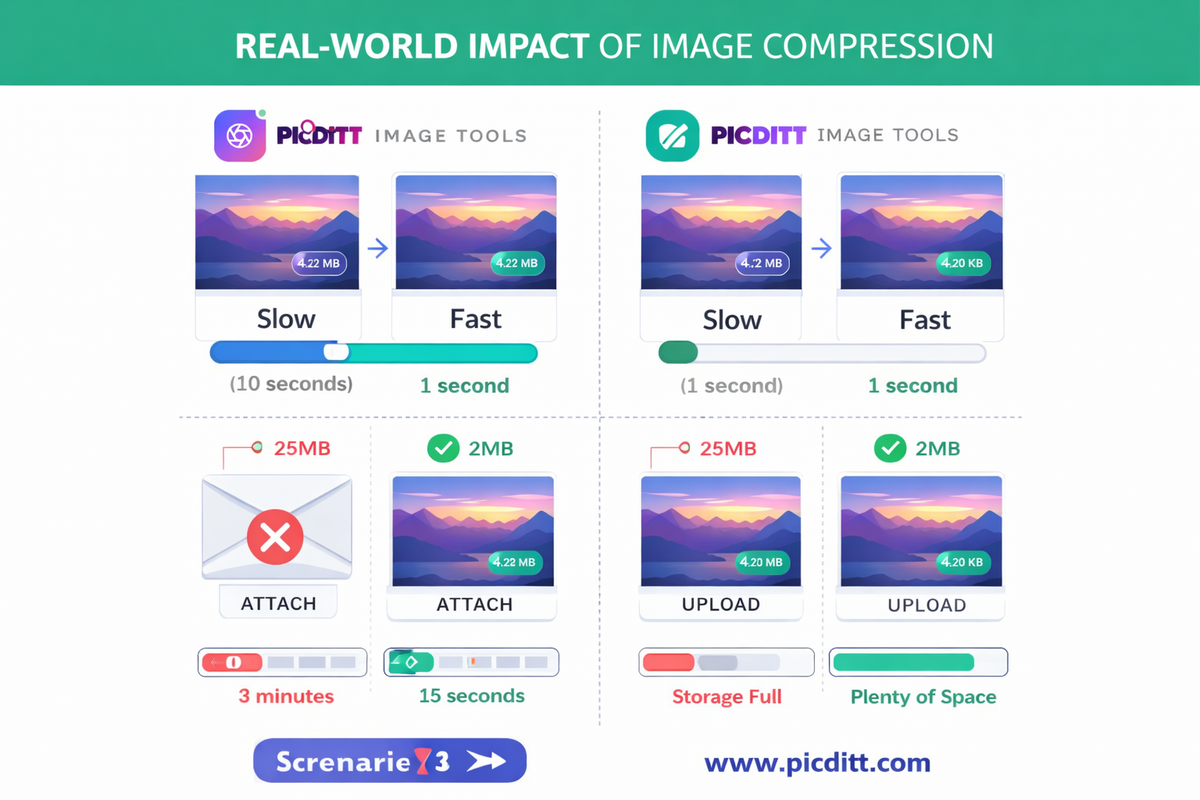
Your website is slow. Your email attachment keeps bouncing. Your social media upload is taking three minutes. Your phone storage is almost full — again.
In almost every case, oversized image files are the culprit.
A single uncompressed photograph from a modern smartphone can be 4–8 megabytes. A webpage with ten of these images loads in fifteen seconds on a mobile connection. An email with five attached photos bounces against the 25MB limit. A social media post takes an agonizing minute to upload on a typical connection.
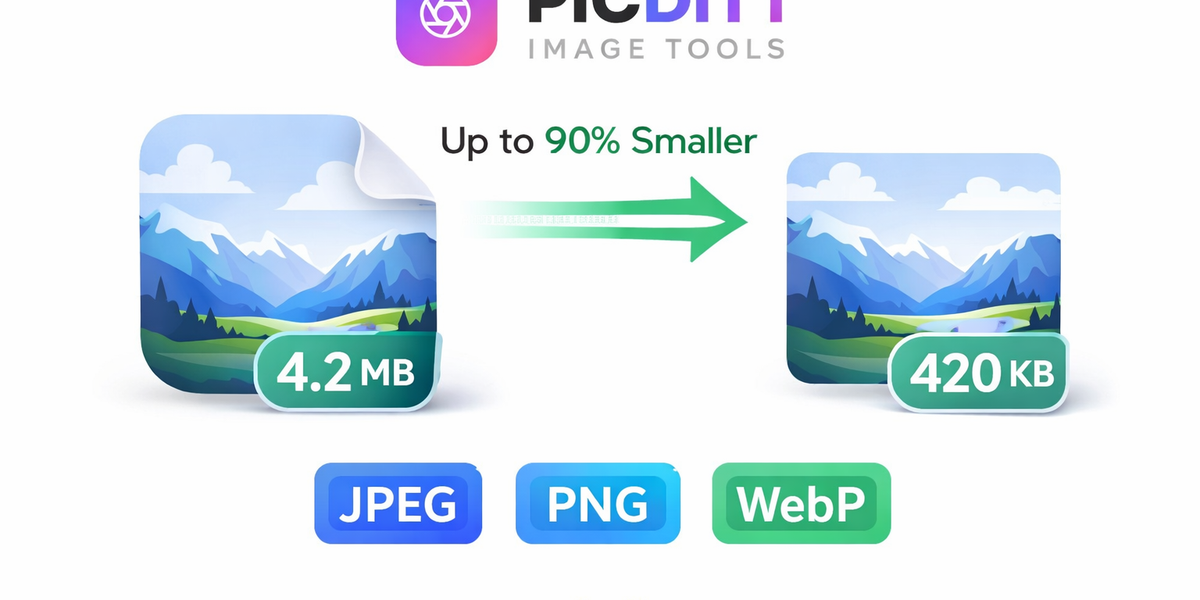
Image compression fixes all of this — and when done correctly, the visual difference between a compressed and uncompressed image is completely invisible to the human eye.
This complete guide covers everything: how compression actually works, why quality loss is not inevitable, which file format to choose for every situation, and how to use the free Picditt Image Compressor to reduce any image by up to 90% with a live preview showing you exactly what you are getting before you download.
How Image Compression Actually Works
Understanding the basics of compression helps you make better decisions about quality settings and format choices. You do not need a technical background — the concepts are straightforward.
What an Image File Actually Is
A digital image is a grid of pixels — tiny colored squares arranged in rows and columns. A 4000×3000 pixel photograph contains 12 million individual pixels. Each pixel stores color information as three values (red, green, blue) each requiring storage space.
An uncompressed 4000×3000 image at full color depth would require approximately 36 megabytes of storage. Obviously most image files are much smaller — because compression is already being applied.
Lossy vs Lossless Compression
Lossy compression permanently removes some image data to achieve smaller file sizes. The removed data is carefully chosen to be the information that human eyes are least sensitive to — subtle color variations in smooth gradients, fine texture details in busy areas, and redundant color information in solid regions.
When done well, lossy compression at 80-90% quality produces images that are visually indistinguishable from the original — but 5-10 times smaller.
JPEG and WebP use lossy compression. They are ideal for photographs and complex images with many colors and gradients.
Lossless compression reorganizes image data more efficiently without removing any information. The original image can be perfectly reconstructed from the compressed file. File size reduction is more modest — typically 20-40% — but image quality is mathematically identical to the original.
PNG uses lossless compression. It is ideal for graphics, logos, screenshots, and images with text where every pixel must be exact.
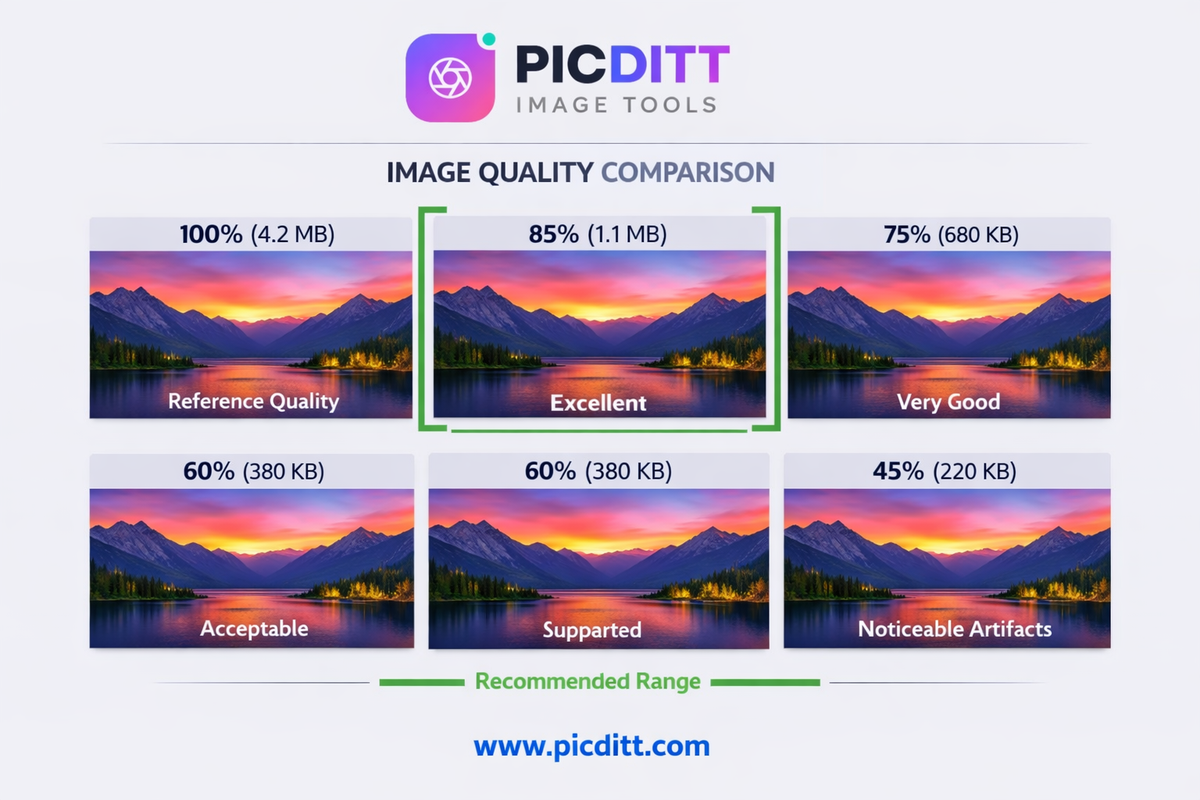
The Quality Setting Explained
When you compress a JPEG or WebP image, the quality setting (typically 1-100%) controls how aggressively the lossy algorithm removes data:
Quality Setting
File Size
Visual Quality
Best For
90-100%
Large
Identical to original
Professional printing, archiving
80-90%
Medium
Indistinguishable
Web use, portfolios
70-80%
Small
Excellent
Social media, email
60-70%
Very small
Good
Thumbnails, previews
Below 60%
Tiny
Noticeable artifacts
Only when file size is critical
The sweet spot for most use cases is 75-85% — this range typically reduces file size by 60-80% while maintaining quality that most people cannot distinguish from the original.

Choosing the Right Image Format
Format selection has as much impact on file size as compression quality. Choosing the wrong format can mean files 3-5 times larger than necessary — or visible quality issues that no compression setting can fix.
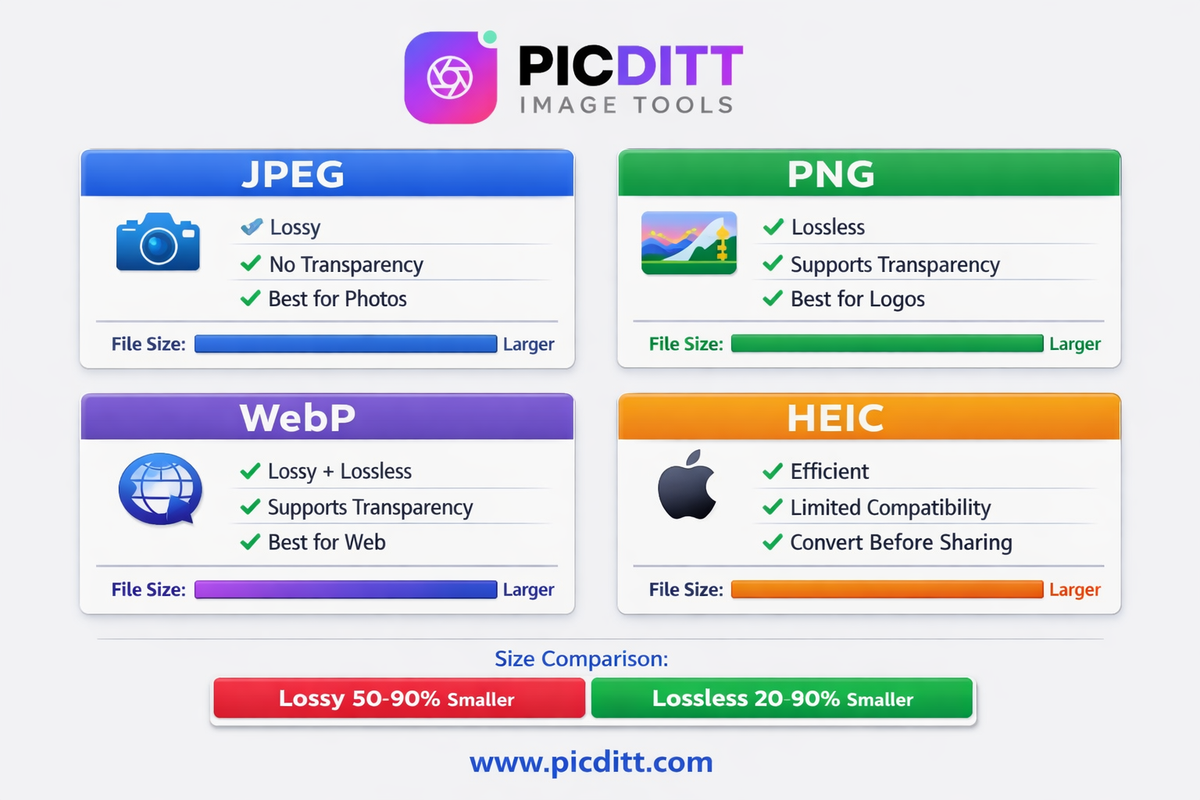
JPEG (JPG) — The Photography Standard
JPEG has been the standard for photographic images for three decades. Its lossy compression algorithm is specifically optimized for the types of color gradients and tonal variations found in photographs.
Use JPEG for:
- Photographs of any subject
- Any image with complex color gradients
- Product photos for e-commerce
- Portrait and event photography
- Any image where transparency is not needed
Avoid JPEG for:
- Images containing text or sharp edges (compression artifacts appear at text boundaries)
- Logos and graphics with flat colors
- Images requiring transparent backgrounds
- Screenshots of interfaces or documents
Typical compression: 70-90% quality produces 5-15x size reduction with minimal visible quality loss.
PNG — The Graphics Standard
PNG uses lossless compression, meaning every pixel in the output is identical to the original. This makes PNG ideal for content where pixel-perfect accuracy matters.
Use PNG for:
- Logos and brand graphics
- Screenshots and interface captures
- Images with transparent backgrounds
- Graphics with text overlays
- Any image where sharp edges must remain crisp
Avoid PNG for:
- Photographs (files will be much larger than equivalent JPEG)
- Any image where transparency is not needed and file size matters
Typical compression: 20-40% size reduction while maintaining perfect quality.
WebP — The Modern Web Standard
WebP was developed by Google and offers superior compression compared to both JPEG and PNG. At equivalent visual quality, WebP files are typically 25-35% smaller than JPEG and 25-35% smaller than PNG.
Use WebP for:
- Website images where page speed is critical
- Any modern web application
- Social media images
- Any context where your audience uses modern browsers
Important note: WebP is supported by all modern browsers (Chrome, Firefox, Safari, Edge) but older systems (Internet Explorer, some older mobile browsers) do not support it. For maximum compatibility, use JPEG or PNG. For modern web use, WebP is almost always the best choice.
Typical compression: 25-35% smaller than JPEG at equivalent quality, with transparency support like PNG.
HEIC — Apple's Efficient Format
HEIC (High Efficiency Image Container) is the default format for photos taken on iPhones and iPads. It produces smaller files than JPEG while maintaining higher quality — ideal for device storage.
The problem: HEIC has limited compatibility outside Apple's ecosystem. Windows requires additional codecs to open HEIC files. Most web platforms and email clients do not support HEIC natively.
Solution: The Picditt Image Compressor converts HEIC to JPEG, PNG, or WebP — making iPhone photos universally compatible for sharing and web use.
Introducing the Picditt Image Compressor
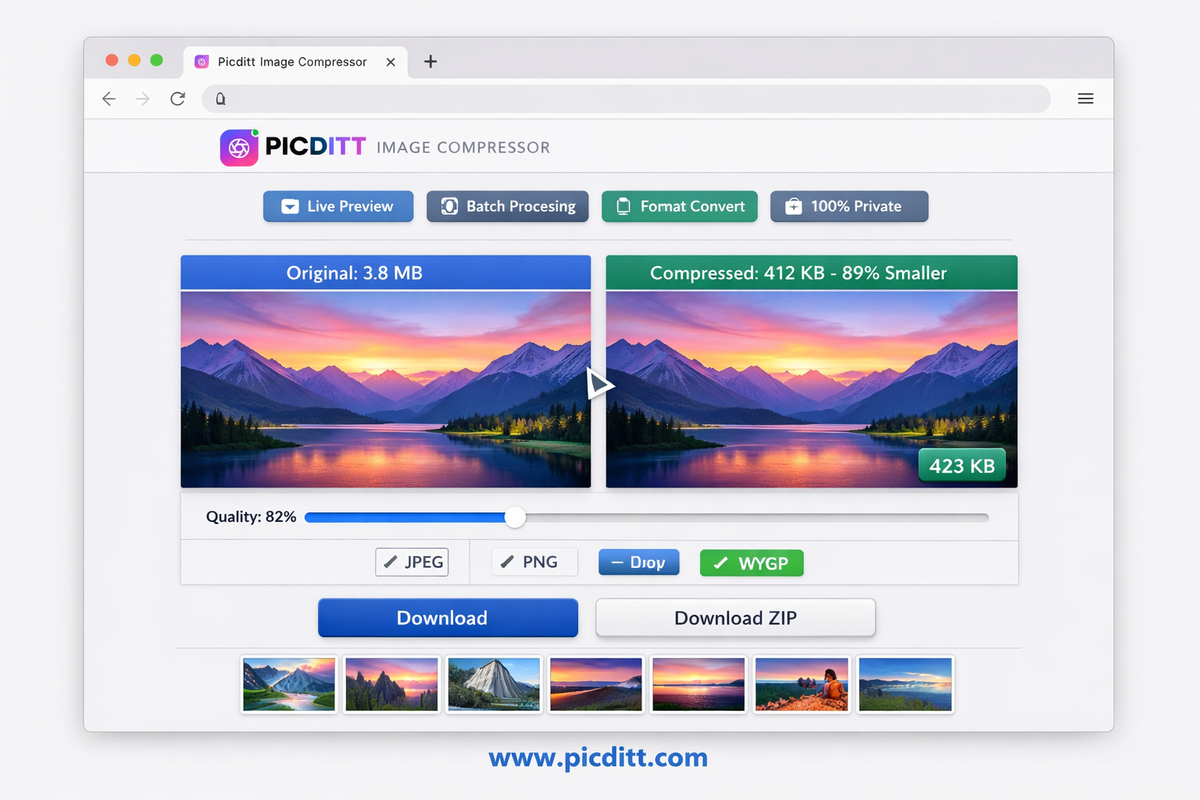
The Picditt Image Compressor is a free, browser-based image optimization tool that compresses, converts, and resizes images — with live before-and-after preview, batch processing, and complete privacy.
Why Local Processing Matters for Images
Most online image compressors work by uploading your images to a remote server. Your photos are transmitted across the internet, processed on someone else's computer, and then sent back for download. For personal photos, business images, and any content you would prefer to keep private, this creates unnecessary exposure.
The Picditt Image Compressor processes everything 100% in your browser. Your images load into browser memory, all compression and conversion happens on your device using browser-based algorithms, and the compressed files download directly to your storage. No image data is ever transmitted to any server.
This means:
- Faster processing — no upload wait time, instant local compression
- Complete privacy — your images never leave your device
- Works offline — after the page loads, internet is not required
- No file size anxiety — no server-side limits on how large your files can be
Key Features
Quality Control (1-100%)
Fine-tune compression from maximum compression to near-lossless with a quality slider. Real-time preview shows you exactly how each quality level affects your image before you download.
Format Conversion
Convert between JPEG, PNG, WebP, and HEIC in any direction. Convert iPhone HEIC photos to universal JPEG, convert JPEGs to modern WebP for web use, or convert any format to PNG for transparency support.
Smart Resize
Resize images by percentage, exact pixel dimensions, or popular presets (social media sizes, print sizes, web sizes). Resize and compress in a single operation.
Live Before-and-After Preview
See your compressed image side-by-side with the original before downloading. The file size savings are displayed in real time — you see exactly how many KB or MB you are saving before committing to download.
Detailed Image Statistics
For every uploaded image, the tool displays the current format, file size in KB or MB, and exact pixel dimensions. This information appears instantly on upload — no processing required.
Batch Processing with ZIP Download
Upload unlimited images and compress them all in a single session. Download all compressed images as a convenient ZIP bundle or download individually.
100% Free — No Limits
No daily usage limits, no file count restrictions, no watermarks on output. Convert and compress as many images as you need, completely free.
Technical Specifications
Specification
Details
Input Formats
JPEG, JPG, PNG, WebP, GIF, BMP, HEIC
Output Formats
JPEG, PNG, WebP, HEIC
Quality Range
1% to 100%
Maximum File Size
50 MB per image
Batch Processing
Unlimited images
Resize Options
Percentage, dimensions, presets
Processing
100% browser-based (client-side)
Privacy
Images never uploaded to any server
Cost
Free forever, no limits
Registration
None required
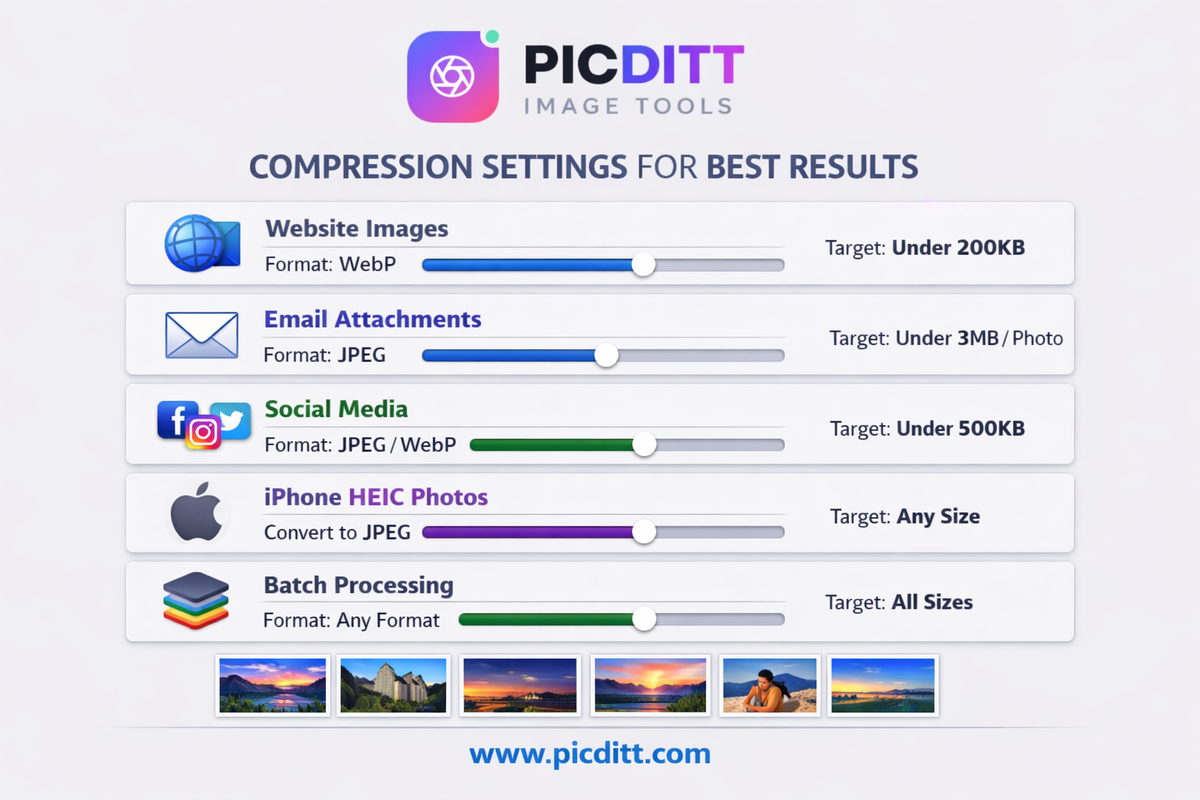
Step-by-Step Guide: Compressing Images for Every Use Case
How to Compress Images for Your Website
Website performance is directly tied to image file sizes. Google's PageSpeed Insights and Core Web Vitals metrics penalize pages with oversized images. The target for most web images is under 200KB for hero images and under 100KB for smaller content images.
Step 1: Open https://picditt.com/compress
Step 2: Upload your images — drag and drop or click to browse. The tool instantly shows each image's current format, size, and dimensions.
Step 3: Select WebP as your output format. WebP is the best format for web use — 25-35% smaller than JPEG at equivalent quality, with transparency support.
Step 4: Start with quality 80%. Check the live preview. For most photographs, 80% quality is indistinguishable from the original at web display sizes.
Step 5: If the file is still above your target size, reduce quality to 75% and check again. Most web images reach under 100KB at 70-80% WebP quality.
Step 6: Download your optimized images and replace the originals on your website.
Target file sizes for web:
- Hero/banner images: Under 300KB
- Blog post images: Under 200KB
- Thumbnails: Under 50KB
- Product images: Under 150KB
How to Compress Images for Email Attachments
Most email providers have attachment size limits between 10-25MB. A batch of smartphone photos can easily exceed this, causing email bounces.
Step 1: Upload all photos you want to attach
Step 2: Select JPEG format — maximum compatibility with all email clients
Step 3: Set quality to 75-80% — significant size reduction while maintaining good quality for recipients to view and print
Step 4: Use the Resize option to reduce dimensions if photos are very large. Resizing to 2000px on the longest side is sufficient for email sharing.
Step 5: Download as ZIP and attach to your email
Typical result: 10 smartphone photos (40-80MB total) reduced to 3-8MB — well within email attachment limits.
How to Compress Images for Social Media
Social media platforms compress images automatically when you upload them — and their automatic compression is often aggressive and unflattering. By pre-compressing to near the platform's target size, you give the platform less to compress, resulting in better final quality on the platform.
Step 1: Upload your social media image
Step 2: Select the appropriate format:
- Instagram, Facebook, Twitter: JPEG or WebP
- Pinterest: JPEG (widest support)
Step 3: Set quality to 85% — high enough to look great, compressed enough to upload quickly
Step 4: Resize to platform-recommended dimensions if needed (Instagram: 1080×1080 for square, 1080×1350 for portrait)
Step 5: Download and upload to your platform
How to Convert HEIC iPhone Photos
iPhone photos saved in HEIC format cannot be opened on many devices and platforms. Converting to JPEG makes them universally compatible.
Step 1: Upload your HEIC files — the tool accepts HEIC format directly
Step 2: Select JPEG as output format for maximum compatibility
Step 3: Set quality to 85% — HEIC to JPEG conversion at this quality produces excellent results
Step 4: Download your JPEG files — now compatible with Windows, Android, web browsers, and all sharing platforms
How to Batch Compress Multiple Images
For compressing many images at once — product photos, event photography, website image libraries — batch processing saves significant time.
Step 1: Upload all images simultaneously by selecting multiple files or dragging a folder's contents
Step 2: Apply your preferred settings — the same format and quality applies to all images in the batch
Step 3: Review the before-and-after preview for a few images to confirm settings look good
Step 4: Click Download All as ZIP — all compressed images bundle into a single ZIP file for convenient downloading
Understanding File Size vs Quality Trade-Offs
The most common fear about image compression is quality loss. Here is the honest truth about when compression affects quality and when it does not.
When You Cannot See the Difference
At quality settings of 75% and above for JPEG and WebP, the vast majority of images — particularly photographs — look identical to the uncompressed original when viewed on screen at normal sizes. The human visual system is not sensitive enough to detect the subtle changes that compression makes at these quality levels.
This means that for websites, social media, email, and most everyday uses, compressing at 80% quality produces a result that is functionally identical to the original.
When Compression Artifacts Become Visible
Compression artifacts become visible when:
- Quality drops below 60-65% — blocky patterns appear in smooth gradients and around edges
- Images contain sharp text — JPEG compression creates visible blurring around character edges at moderate compression levels
- Images are highly enlarged — compression artifacts invisible at 100% view become visible when zoomed to 200%+ magnification
- Images undergo repeated compression — saving a JPEG as JPEG repeatedly compounds quality loss each time
The Golden Rule
Always compress from the original, uncompressed source. Never compress a file that has already been compressed. Each compression cycle compounds quality loss. Keep your original files and compress fresh copies as needed.
The Picditt tool never modifies your original files — it always generates a new compressed copy while leaving the source unchanged.
Common Image Compression Mistakes to Avoid
Mistake 1: Compressing Already-Compressed Images
Opening a JPEG, editing it, and saving it as JPEG again applies lossy compression twice. Do this ten times and the quality degradation becomes severe. Always work from original RAW files or the highest quality version available.
Mistake 2: Using JPEG for Graphics and Text
JPEG compression creates visible artifacts around sharp edges — the boundaries between colors in logos, the edges of text characters, and the borders of interface elements. Always use PNG for graphics containing text or sharp geometric elements.
Mistake 3: Setting Quality Too Low for Printing
Web display and print have very different quality requirements. An image that looks fine on screen at 72-96 DPI may look terrible when printed at 300 DPI. Always use 90%+ quality for any image intended for print.
Mistake 4: Ignoring Dimensions
A 4000×3000 pixel image displayed at 800×600 pixels on a website is four times larger than necessary. Compress AND resize — reducing dimensions from 4000px to 1200px reduces file size by 89% before any quality compression is even applied.
Mistake 5: Using the Wrong Format for the Content
Using JPEG for a logo with transparent areas, or using PNG for a large photograph — both result in files significantly larger than the optimal format choice. Match format to content type as described in the format guide above.
Frequently Asked Questions
How much can I compress an image without losing quality?
For photographs using JPEG or WebP format, quality settings of 75-85% typically produce files 70-85% smaller than the original with no visible quality loss for screen viewing. The exact amount depends on the image content — images with smooth gradients and simple subjects compress more aggressively than images with complex textures and fine details.
What is the best format for compressing website images?
WebP is the best format for modern web use. It is 25-35% smaller than JPEG at equivalent quality, supports transparency like PNG, and is supported by all modern browsers. For maximum browser compatibility including older systems, JPEG remains the most reliable choice for photographs.
Will compressing my images make them look blurry?
At quality settings of 75% and above, no — compression does not cause blurriness. Blurriness is a symptom of excessive resizing, not compression. Compression at moderate settings removes color information that eyes cannot detect, not the sharpness information that determines perceived clarity.
Can I compress PNG images?
Yes, but PNG uses lossless compression so the reduction is more modest than JPEG — typically 20-40%. You cannot set a "quality" level for PNG because all PNG compression is lossless. If you need more aggressive size reduction on PNG content, consider converting to WebP which supports transparency while achieving much better compression.
Does compressing images affect their dimensions?
No — compression and resizing are separate operations. Compression reduces file size by reducing color information. Resizing changes the pixel dimensions. The Picditt tool lets you do both independently or together in a single operation.
How do I convert iPhone HEIC photos to JPEG?
Upload your HEIC files to the Picditt Image Compressor, select JPEG as the output format, set your preferred quality (85% recommended), and download. The tool converts HEIC to universally compatible JPEG instantly without any external software.
Is there a limit to how many images I can compress at once?
No. The tool supports unlimited images in a single batch session. Upload as many as your browser's available memory supports — typically hundreds of images. Download all compressed images as a ZIP bundle in one click.
Does the tool store my compressed images anywhere?
No. All processing happens 100% within your browser. Your images are loaded into browser memory and never transmitted to any server. When you close the browser tab, all image data is cleared from memory. The only copy of your compressed images is the one you download to your device.

Final Thoughts: Stop Sending Oversized Images
Every oversized image you share online — on your website, in an email, on social media — is working against you. It loads slowly, fails attachment limits, and gets aggressively re-compressed by platforms that do it worse than you would.
Image compression takes thirty seconds and produces results that are visually identical to the original while being 5-10 times smaller. There is no good reason not to compress every image before sharing it.
The free Picditt Image Compressor makes this effortless:
- Upload any image in any format — JPEG, PNG, WebP, HEIC, GIF, BMP
- See your image's current format, size, and dimensions instantly
- Choose your target format and quality with live preview
- Download individually or as a ZIP bundle
- Your images never leave your device
Whether you are compressing a single product photo or batch-processing an entire photo library, the tool handles it instantly, privately, and at no cost.
Compress Your Images Free — Up to 90% Smaller, No Quality Loss →
Ready to Try It Yourself?
Use this tool for free — no signup, no download, no watermarks.
Open Free ToolYou Might Also Like

How to Convert PDF to High-Resolution JPG, PNG, or WebP Instantly
Need to post a PDF on social media or embed it on a website? Learn how to instantly convert your PDF documents into high-quality JPG, PNG, or WebP images using Picditt's free online converter. All processing happens securely in your browser — your files never leave your device.
Read More →
How to Merge PDF Files Free Online (Without Uploading Your Data)
Stop sending multiple email attachments! Learn how to combine and merge multiple PDF files into a single, professional document in seconds. Picditt's free online PDF Merger lets you drag, drop, and reorder pages entirely in your browser — meaning zero server uploads, lightning-fast speeds, and 100% data privacy for your sensitive documents.
Read More →
How to Compress Images to Any Size Online Free — The Complete Guide
Learn how to compress images to any file size online for free. Reduce JPEG, PNG, and WebP photos for email, websites, forms, and social media — without losing visible quality. No signup required.
Read More →